Showing posts with label wedding. Show all posts

Monday, April 28, 2014

{two year anniversary}


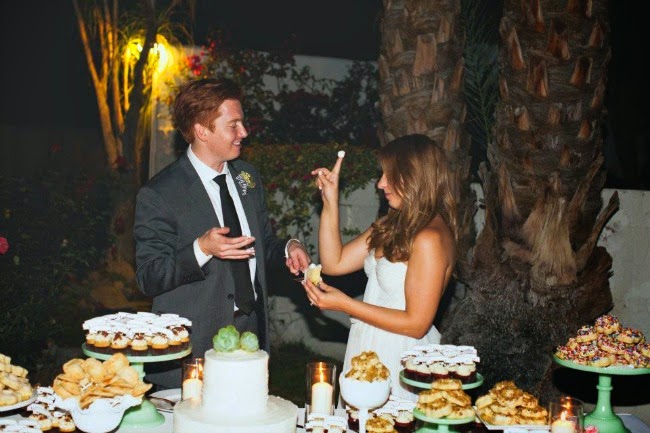
Today marks our 2-year wedding anniversary which blows my mind even now as I write it since it feels like a week ago that we were loading up a Uhaul full of wedding DIYs to head out to the desert and celebrate with 130 of our closest friends and family.  Even though we are only 2 years in as far as our wedding date goes, Chris and I were actually together for almost 10 years before making it official. While I certainly don't claim to know everything it takes to make a successful marriage, I do know that every year we have been together has been even better than the one before.  If we can keep that up for many years to come then I'd like to think we've got it figured out.

Last year Chris surprised me with a weekend trip to Palm Springs to celebrate our first anniversary (you can see a little video I made from that trip here)  This year (in addition to our anniversary gift tradition) we are going decidedly more low-key with a dinner tomorrow night at one our favorite places in Chicago.


Thursday, September 12, 2013

{diy venetian lace robe}


I have been coveting this amazing robe by Stone Cold Fox forever so when I came across an incredible selection of venetian lace on a recent trip to the downtown Los Angeles fashion district, I just knew I had to try my hand at making one for myself.  A yard and half of this ivory venetian lace, this ivory kimono robe and some white thread is all you need to make this for yourself.

The addition of this intricate lace to a simple luxe silk robe gives it fun romantic-bohemian feel- perfect for a lightweight cover up for lounging in on the weekends.  I was pleasantly surprised at how easy this project turned out to be taking only about an hour from start to finish.  These robes would make for a perfect bridal robe on your big day or you could attach the lace to a fun printed robe for your bridesmaids. Directions for this DIY at the bottom of the post.


{I also picked up some black lace to add to a black version of the kimono robe that I already own} 

{pinning is a must when working with slippery silk fabric} 

 {make sure to set your stitches as wide as possible- you will risk snagging the silk with too tight of a stitch}


{breakfast in bed with muji}


what you need:
  • 3/4 sleeve kimono robe (this would be a fun printed alternative)
  • 1.5 yards of Venetian lace- preferably something 4 inches wide or more (I bought mine from this company which is my favorite place for ribbon & trims- you can call them if you are not local to LA and they will ship anywhere! 
  • corresponding thread 
  • sewing needle
  1. Cut the lace to the diameter of the kimono sleeve
  2. Pin lave on top of sleeve- use lots of pins as it will save you later from making a mistake or attaching the lace unevenly
  3. Using your sewing machine sew a wide stitch simple sew right on top of the lace attaching it to the silk sleeve. Trim any loose threads. note: if you do not have a sewing machine you can certainly hand-stitch the entire piece of lace to attach it to the sleeve using a running stitch.
  4. Hand- sew the ends where the lace meets by using a simple Overcast stitch.
  5. Enjoy your fabulous robe. 


Thursday, July 25, 2013

{packing for a park city wedding weekend}


I could not be more excited to be on my way to Park City, Utah to celebrate the wedding of two of my favorite friends, Ben & Terra.  Ben and I went to school together through elementary, junior and high school and Terra was my maid of honor.  On top of all that, Chris and I actually lived with Ben & Terra for two and half years in our Silverlake house when we first moved to Los Angeles so this wedding is really close to my heart.  Ben and Terra have been together for over 12 years so they aren't just having one night of wedding celebration, but a whole wedding weekend which meant that I found myself packing for a lot of different events!

I have been travelling quite a bit this summer and I don't normally do run downs of my packing list, but I am so excited to wear all these outfits that I thought it might be fun to share a little peek at my suitcase contents!

 {dress from ASOS, INC jacket (similar here), vintage gucci clutch (similar here), Target belt, Zara shoes, Forever 21 shoes}


 {bridesmaid's dress from fashion district in DTLA, Zara leather jacket, Bibi Lou heels (similar here), vintage glitter clutch (similar here), Forever 21 necklace, Flutter Fetti}

{Akira maxi dress, Forever 21 fringe top, Akira floral shorts, Zinke one piece swimsuit (other color available here)}

Monday, July 15, 2013

{ashlee + stephen's wedding invites}

{adorable save the date photo by www.bvaphoto.com}

I recently got the chance to create Ashlee's & Stephen's wedding invitation suite (you might remember seeing a sneak peek right here).  Ashlee's wedding is taking place in early September and based off our conversations about her vision, I was inspired to create her invite designs based around an idea of a laid back yet glam summer dinner party.  The wedding ceremony and reception will be outdoors at an estate on a golf course in Northern California with touches of black, white, silver & cabana stripes.  I absolutely love how these turned out so I thought I would share them with you today.  And don't forget to go check out Ashlee's blog that she recently started!


Wednesday, July 3, 2013

{bachelorette party supplies}

Summer means wedding season which is great and all, but the really nice part about wedding season is the cooresponding bachelorette party season!!!  I love a good excuse to throw a fun girly party for a night out filled with champagne and confetti.  My one complaint with bachelorette parties is the obnoxious decor- can we all just agree once and for all to leave the penis crowns and pink zebra striped decorations at the tacky party store where they belong?  Here's a little round up of some fun alternatives for any bachelorette parties in your future:


For the bride:  No need to over-do it, but the bride to be HAS to wear a little something.  This is not negotiable.  When else in her life can she parade drunkenly around in a wedding veil.  Simply inform your bride-to-be friend that this is happening and buy her a simple veil.  And grab the adorable ring sunglasses to go with it!

Groupwear: In addition to the penis crowns, please also leave the matching rhinestone tank tops at home.  You are all better than that and your wardrobes deserve more.  That doesn't mean the ladies shouldn't get the chance to wear a coordinating accessory because like the bride's outfit- when else do you get to parade around with your friends wearing the same cute flair?!?  Colorful flower crowns (diy tutorial here) or bow headbands (see them in action here) make a nice alternative.  Personally I love the chiffon or tulle pouf for the ladies to wear, but I am biased since that's what we did for my bachelorette- see an easy tutorial for those here.   You can't go wrong with a simple pair of earrings like these or festive Lolita sunglasses.

Decor:  If you can just recreate the decor from this amazing 30th birthday party then you will be all set!!! Throw in a pink + gold tassel garland from The Flair Exchange to fancy up your hotel room and add a cute fringed heart on the wall- perfect for photo ops!

Activities:  Since most guests will expect a game, why not make it enjoyable for everyone and have a little blindfolded champagne tasting contest.  Buy a few different bottles of champagne- have all the girls blindly taste them and see if they can guess which is which! Don't forget to pick up a cute blindfold!

Favors:  Whether it is the bride to be or the main party planner who buys some favors for the guests, it is always fun to have a little something to thank everyone for coming.   Load up a cute tote bag with custom cocktail bottles, nail polish and other fun items- see some more ideas what to put in these bags here

Special Extras:  These are just some fun items to bring along for extra credit- girl's night table topics would make for a fun late night activity, custom name krazy straws would be perfect for guests to keep track of their drink and of course a secret stash of confetti never hurts!


Wednesday, May 22, 2013

{our wedding photo album}


I am so excited to finally have the physical copy of our wedding photo album in my possesion!! I have been working on creating this book for a couple months now- continuously tinkering with different photo choices and layouts.   I chose to use Blurb's photo services for our wedding album because I have always had such a great experience with them (you can see the series of photobooks I made with them as well as a link to a super helpful review in this post).

I chose their biggest format which is 12" by 12" square for our album since I knew that all the photos I would be using would of a high enough quality to handle the huge size of the pages.  Initially I debated keeping with a simple one photo per page layout to really highlight each and every shot, but in the end I wanted to include sooo many photos that this would have been unreasonable.  The book includes a variety of layouts from 1 or 2 photos on a page to 4 photo collages to two full page photo spreads.  I only included two pages of text in the entire book which are our wedding vows that we each wrote and surprised each other with during the ceremony.  Blurb just released a line of thick "pro-line" paper which is 140 point paper which costs extra per page, but worth every single penny.

Our book ended up being about 240 pages since I decided at the last minute to include 80 or so pages at the end of my favorite photobooth shots.  Initially I thought the photobooth pictures should be in a separate book, but there are too many great shots that really capture the feeling and emotion of the party/reception that I couldn't leave them out. 

Although the pictures are not as high of quality as they are in the actual printed book, you can see the entire book in digital preview format right here.

**no compensation or sponsorship has been provided to me by Blurb- I really just love their service and quality product!

Here are a few snapshots of our album:


Tuesday, May 14, 2013

{jeff+katie's wedding paper goods}


As you might have seen on instagram last month, we travelled back to Southern California to celebrate the wedding of two of our very good friends, Jeff and Katie.  The event was absolutely beautiful and one of the most fun weekends I have ever had.  The couple was married at one of the most lush southern california venues called Rancho Las Lomas in Silverado Canyon.  Besides being a massive estate with a gorgeous area for the ceremony/reception, there is also a menagerie of zoo animals on the property including tigers and zebras!!


Katie asked myself and fellow bridesmaid, Kay, to help out with creating the menus and programs for the event which we were more than happy to do (and by happy I mean ecstatic- we all know how much I obsess over paper goods!).  We drew inspiration from the color of the bridesmaid's dresses and went with a simple design that showcased white text against the saturated blush/coral backdrop.  And then we of course had them printed at the best kept secret in downtown LA.

Here are a few snapshots of the menus and programs in action on the big day (you can see even more of the lovely photos from this day on their wedding photographer Cean One's blog right here):


 {programs on the ceremony chairs and amazing florals by Chelsea of Hello Gem- the same talented lady who did my own wedding flowers}


{custom beer escort cards/favors plus a little sign you might recognize from here and the 
menus at each dinner place setting}


Congrats Jeff & Katie!


{event images via Cean One Photography, all the rest taken by Mint Love Social Club}

Monday, May 6, 2013

{one year anniversary trip video}


One of the best decisions we made with our wedding was deciding at the last minute to splurge on videography.  I love to watch our highlight video every now and then because it completely transports me back to that day.

Our DLSR camera actually takes great high quality video and I have been meaning to shoot more with it as well as learn how to edit it.  The trip to The Parker Palm Springs that Chris surprised me with for our anniversary seemed like the perfect chance to try it out!  Here's the video we put together using footage from both our DLSR camera and my Iphone then edited in iMovie.   After figuring out the basics of the video editing software, putting together the video was surprisingly quick and easy.  While I definitely have some room for improvement on both shooting video footage and editing it, having this great little memory of our trip definitely motivates me to want to make more videos of future trips.

Our 4 day trip to LA and The Parker Palm Springs was a much needed trip to warmer weather to escape the dismal spring that Chicago is having.  This video sums up our trip which was basically comprised of drinking cocktails, laying by the pool, drinking champagne, playing lawn games and drinking more cocktails - oh and celebrating our first year of marriage!


Wednesday, May 1, 2013

{new traditions}


For the most part Chris and I tend not to give each other extravagant gifts for holidays or milestones. Rather than buy each other something, we have usually taken a trip or purchased something together that would benefit the both of us such as an item for our home.  We never had an official date for the beginning of our relationship so our one year wedding anniversary was the first opportunity we have had to celebrate this kind of milestone. 

We decided that our first wedding anniversary would be a great chance to start a new tradition that we could honor every year on our wedding date.  We agreed that rather than getting gifts*, we would purchase a small print or piece of framed art each year in hopes of creating a memorable gallery wall years later.  We also decided to write notes to each other and attach them to the back of the frame to be read on our anniversary five years later- meaning we won't read year one's note until the fifth year anniversary and year two's note until the sixth year, etc.  

Originally we decided on this beautiful photo of a Palm Springs sunset available on art.com, but when I went to purchase it two weeks ago it had mysteriously disappeared from the site!  In a scramble to find something we loved just as much to replace it and ultimately coming up empty handed, we chose instead to select a photo from our wedding and have it enlarged to 12' by 16".   Our photographers captured this beautiful image of a pair of lawn chairs that were nestled near the dinner tables at our reception at The Cree Estate and something about this image just felt romantic and private (plus the light in the photo is gorgeous)!

*chris broke this agreement by surprising me with a trip to The Parker for 4 days!


Monday, April 29, 2013

{one year}


Yesterday marked our one year wedding anniversary!  I know it's cliche, but I really cannot believe how fast this entire has flown by.  I have heard that people say the first year of marriage is the hardest, but ever since I have been with Chris every single year has proved to be even better than the one previous with this year being the best one yet.  Chris surprised me with trip to California where we are currently celebrating our anniversary at one my favorite places, The Parker Palm Springs.  The Parker happens to be where we spent our wedding night as well as my bachelorette party so it holds a really special place in my heart.