

Showing posts with label personal photos. Show all posts
Showing posts with label personal photos. Show all posts
Tuesday, May 27, 2014
{moving news: we're headed back to LA!}
Monday, April 28, 2014
{two year anniversary}

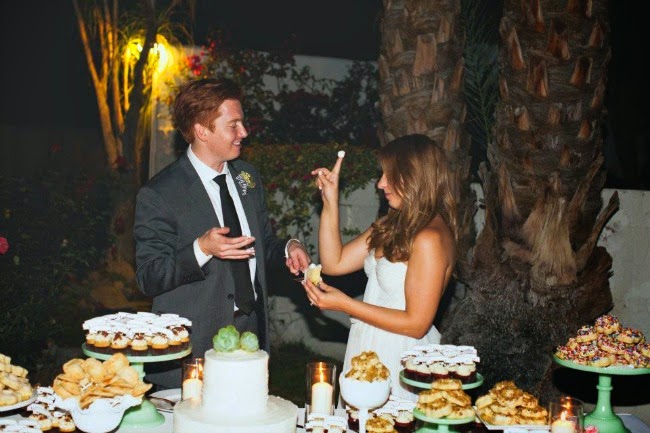
Today marks our 2-year wedding anniversary which blows my mind even now as I write it since it feels like a week ago that we were loading up a Uhaul full of wedding DIYs to head out to the desert and celebrate with 130 of our closest friends and family. Even though we are only 2 years in as far as our wedding date goes, Chris and I were actually together for almost 10 years before making it official. While I certainly don't claim to know everything it takes to make a successful marriage, I do know that every year we have been together has been even better than the one before. If we can keep that up for many years to come then I'd like to think we've got it figured out.
Last year Chris surprised me with a weekend trip to Palm Springs to celebrate our first anniversary (you can see a little video I made from that trip here) This year (in addition to our anniversary gift tradition) we are going decidedly more low-key with a dinner tomorrow night at one our favorite places in Chicago.




Tuesday, December 24, 2013
{our holiday cards}

Last year I used Minted to create our holiday cards and I was conveniently able to use one of our wedding photos since it was the Christmas following our April wedding. This year I went the complete DIY route by designing the cards myself having them printed locally in Chicago. I knew I wanted to take our holiday photo in front of the Chicago skyline so we opted to get a little dressed up and use North Avenue Beach for a quick photoshoot.
My handwriting is horrible so I always chose to fully print our return and recipient addresses since it doesn't take that much longer than handwriting them all. I used the same envelopes from last year opted for the red version which I ordered from right here. I am really happy with how simple this design turned out- especially the mix of the light mint green with the stark bright red seams on the envelopes. Plus DIY-ing the whole thing saved money and allowed me to get exactly what I had in mind!


Thursday, June 6, 2013
{charity cocktail class video + printables}
A few months ago, I helped out on the committee for Kellogg's annual Charity Auction Ball which is the annual charity formal that Chris' MBA program puts on (check us out at the event here, here, & here). This year they raised over 70K for three different local charities through silent auctions. The auctions are made up of typical items like sports tickets and vacations as well as the very popular "student donations" where students "donate" social events or outings that fellow students can bid on. Chris and Josh donated a cocktail class in our home for 6 lucky students to enjoy. We hosted the lucky winners a few weeks ago and had such a great time (although it didn't feel too terribly different than a regular Saturday night around our place!)

Chris and Josh created a menu of 6 different cocktails for our guests including classic recipes (like this one), a fabulous punch, and one original recipe the guys came up with. I designed a small booklet for each of the guests to take home with all of the recipes from the evening because quite honestly after 6 cocktails, I dont expect anyone to remember cocktail recipe proportions! Inspired by this amazing wedding program, I placed the recipe instructions on top of fun summer-inspired images that I altered into almost transparent backgrounds. I then printed the recipes four up on a regular letter sized page, cut them out and assembled them together with a simple gold brad in the corner. You can download the full files for these cocktail recipes at the bottom of this post!
After having so much fun creating the video from our anniversary weekend, I decided to try out making a short video from the cocktail class and I am equally pleased with how this one turned out! I hope you enjoy taking part in the evening through this video as much as I do.

Wednesday, May 22, 2013
{our wedding photo album}

I chose their biggest format which is 12" by 12" square for our album since I knew that all the photos I would be using would of a high enough quality to handle the huge size of the pages. Initially I debated keeping with a simple one photo per page layout to really highlight each and every shot, but in the end I wanted to include sooo many photos that this would have been unreasonable. The book includes a variety of layouts from 1 or 2 photos on a page to 4 photo collages to two full page photo spreads. I only included two pages of text in the entire book which are our wedding vows that we each wrote and surprised each other with during the ceremony. Blurb just released a line of thick "pro-line" paper which is 140 point paper which costs extra per page, but worth every single penny.
Our book ended up being about 240 pages since I decided at the last minute to include 80 or so pages at the end of my favorite photobooth shots. Initially I thought the photobooth pictures should be in a separate book, but there are too many great shots that really capture the feeling and emotion of the party/reception that I couldn't leave them out.
Although the pictures are not as high of quality as they are in the actual printed book, you can see the entire book in digital preview format right here.
**no compensation or sponsorship has been provided to me by Blurb- I really just love their service and quality product!
Here are a few snapshots of our album:
Here are a few snapshots of our album:


Wednesday, May 1, 2013
{new traditions}

We decided that our first wedding anniversary would be a great chance to start a new tradition that we could honor every year on our wedding date. We agreed that rather than getting gifts*, we would purchase a small print or piece of framed art each year in hopes of creating a memorable gallery wall years later. We also decided to write notes to each other and attach them to the back of the frame to be read on our anniversary five years later- meaning we won't read year one's note until the fifth year anniversary and year two's note until the sixth year, etc.


Originally we decided on this beautiful photo of a Palm Springs sunset available on art.com, but when I went to purchase it two weeks ago it had mysteriously disappeared
*chris broke this agreement by surprising me with a trip to The Parker for 4 days!
Monday, April 29, 2013
{one year}

Yesterday marked our one year wedding anniversary! I know it's cliche, but I really cannot believe how fast this entire has flown by. I have heard that people say the first year of marriage is the hardest, but ever since I have been with Chris every single year has proved to be even better than the one previous with this year being the best one yet. Chris surprised me with trip to California where we are currently celebrating our anniversary at one my favorite places, The Parker Palm Springs. The Parker happens to be where we spent our wedding night as well as my bachelorette party so it holds a really special place in my heart.
Re-live all the wedding posts here or the video here.


Tuesday, April 2, 2013
{bachelorette party pins}

For Katie's bachelorette, we debated between embellished sashes or some sort of headpiece, but ultimately we decided to create some custom pins with girly ribbon and sequins inspired by this image. I designed the simple pink heart design and then we ordered 3" custom buttons through Zazzle. This was my first time using Zazzle and it proved to be completely painless- the shipping was free and the pins looked picture perfect for less than $3 each! I created a "bride to be" pin for the guest of honor and a "katie's final fling" pin for the rest of the group since we had a mix of bridal party members as well as good friends otherwise I would have done a "bridesmaid" option.
We picked up a mix of grosgrain ribbon, satin ribbon, lace, sequin strands and fringe in the fabric district of downtown Los Angeles. The bride's pin included some exclusive striped pink ribbon as well as white lace while the rest of the pins featured a mixture of light to bright pinks in the varying materials. We cut each of the pieces of ribbon/sequins about 6 inches long and hot glued them directly onto the back of the pin.
These were such an easy project and would lend themselves well to a variety of events- even if you are just making one singular pin for the guest of honor at a birthday or baby/bridal shower. Since there is no minimum order quantity on Zazzle, you can order one singular pin and the price/shipping does not change. How amazing would a simple version of these pins be as personalized place-cards for a wedding or dinner party?!?


Tuesday, January 29, 2013
{entryway changes + gallery wall}

With the recent rearranging of furniture in our living room, we also made some significant changes to our entryway. The small table I originally purchased for this space back in September now serves a table under TV in our living room. The fauxdenza that we had originally placed under the TV has been located to to the entryway, but is still a work in progress as we shop for that perfect piece of wood to use for the top. I actually prefer the fauzdenza in the entryway as the floating aspect of the shelves is very visible from the seating in the living room. We picked up this runner rug in a simple black and white pattern from the Nate Berkus for Target collection.
The biggest change to our entry is the small photo gallery wall which is something I have had on my to do list forever. For the longest time I couldn't decide if I wanted to do all photos from our wedding or just a collection of our favorite snapshots from over the years. Then once I decide on using just wedding photos, I debated between how many photos I should use or if I should include varying sizes and frames. Ultimately, I felt the space was a little small to do many more than 4 to 6 photos total. I also felt a mixture of photo sizes and frames would make the space look too busy or cluttered. What finally pushed me to complete this project was when I came across these frames at Target. I loved the proportions of the exaggerated matting to house an 8' by 10" photo- plus at $15 each they were considerably less than anything else I had seen and liked.
There are still a few minor projects on my to do list for this area including finding something interesting to add to the back of the door like an inspiring art print or even a bold paint color. I would also love to do some contrasting painted borders on doors of the coat closet that faces the fauzdenza (not pictured because those closets are incredibly boring).

{if anyone knows of a great lumber yard in the Chicago area that we can locate a pretty wood top for this fauzdenza don't hesitate to pass that info along!}

{some of my favorite shots from our wedding captured by EPLove}

{bridal party portrait framed in this Target frame}
Thursday, January 3, 2013
{a new years eve dinner party}

Originally I had wanted to try to re-create this party for the decor of our NYE dinner, but many of the elements I would have needed to execute this theme well were back in our Chicago place. After spotting this Monte Carlo NYE boxed set at Moskatel's, I decided the loud color scheme would be perfect for an extra vibrant table setting. I picked up a few yards of silver sequin fabric to use as a tablecloth and gold chargers to make each place setting really pop. Details on some of the other smaller table elements are under some of the photos below.
We discussed different menu options for a while, but ended up going with a classic steak frites with filet mignon topped with herbed compound butter served alongside white truffle fries with garlic aoili and sauteed cauliflower with romesco. We started the meal with our our go to Kale Caesar salad and ended with a trio of mini ice cream sandwiches. There is no better New Year's Eve (or any night for that matter) than one surrounded by great food, champagne and close friends. Hopefully there is some truth to theory that how you spend your New Year's Eve indicates how the rest of your year will be because if it is then 2013 is looking like it's going to be pretty great...

{I threw together this backdrop using 2 packs each of gold metallic and white tissue fringe as well as 1 pack each of silver metallic and purple metallic fringe. I simply cut pieces of the garland and arranged it in messy strips that I stapled onto on old sheet. I also couldn't pass up picking up two of these awesome champagne bottle balloons}

{NYE crowns from the boxed set, gold chargers from Sur La Table & custom menus I created}

{I re-purposed a box of silver Christmas crackers by using them as placecards with each guest's name printed on regular copy paper then adhered around the cracker with some spray adhesive}


{Raspberries for cocktails and champagne displayed in a vintage martini glass}


Subscribe to:
Posts (Atom)