Showing posts with label diy. Show all posts

Tuesday, April 29, 2014

{kentucky derby drink flag printable}


Last year we hosted a little Kentucky Derby viewing party (it was actually my first time watching the race!) complete with mint juleps and custom drink stirrers.  I loved how the drink flags turned out so I knew I would have to whip up a batch for the derby this year.  The stirrer set for last year had each horse's name on it and their corresponding jockey's jersey.  Guests selected a stirrer based on their pick for the race's winner which made for a little friendly competition (something that always makes a party a little more fun in my opinion!).

This year I created two options for you: one has only the jerseys on the flag with a corresponding key to what horse that jersey belongs and the other has both the jersey as well as the horse name.   Unless your friends have memorized every jockey's jersey design then you can use the set that has no horse names on it to play a more random game where guests simply pick up a flag.  Click the photo below for access to the free printable downloads.  Simply cut out the flags, adhere them to a small bamboo stick or paper straw, pop it into your mint julep and enjoy!

For Kentucky Derby viewing party inspiration check out the board I put together last year right here!


Tuesday, April 15, 2014

{diy cocktail bitters sugar cubes}


When I saw these DIY angostura sugar cubes on pinterest while we were living in Paris, I knew they would be one of the first projects I wanted to try out as soon as we got home.  I ordered up these mini ice cube molds and then started thinking about which bitters I would use the most in cube form.  I decided in addition to classic Angostura sugar cubes to also mix up some Lavender and Peychaud cube.  

The recipe appears to be quick and simple which usually has me feeling pretty skeptical about how my version will actually turn out, but these were super easy to make and for the most part they popped out the molds in perfect squares!  In addition to being great for a French 75 or Sazerac cocktail, these cubes would also be tasty used as a sweetener for tea or even a fabulous gift idea alongside a bottle of bubbly or booze!  Check out below for the recipe details:


what you need:
  1. Mix together sugar and desired bitters flavor in a bowl until the bitters liquid is well combined with the sugar.
  2. Firmly press sugar into ice cube molds. 
  3. Allow to harden overnight OR pop in the microwave for 30 seconds then let the mold sit for about 30 minutes to fully set before popping out the molded cubes!
  4. Store in airtight container when not in use.


Tuesday, December 24, 2013

{our holiday cards}


Last year I used Minted to create our holiday cards and I was conveniently able to use one of our wedding photos since it was the Christmas following our April wedding.  This year I went the complete DIY route by designing the cards myself having them printed locally in Chicago.  I knew I wanted to take our holiday photo in front of the Chicago skyline so we opted to get a little dressed up and use North Avenue Beach for a quick photoshoot.

My handwriting is horrible so I always chose to fully print our return and recipient addresses since it doesn't take that much longer than handwriting them all.  I used the same envelopes from last year opted for the red version which I ordered from right here.  I am really happy with how simple this design turned out- especially the mix of the light mint green with the stark bright red seams on the envelopes.  Plus DIY-ing the whole thing saved money and allowed me to get exactly what I had in mind!


Wednesday, December 11, 2013

{diy boho holiday garland}


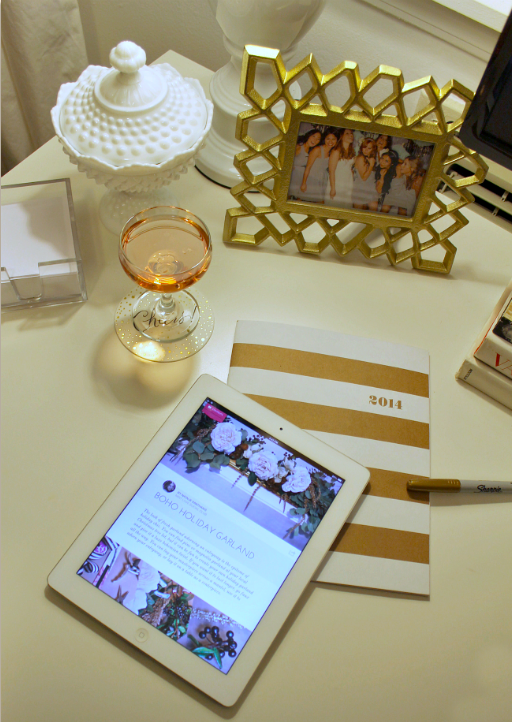
If you haven't downloaded it already then you must go check out the newest edition of the Glam Style Ipad app- partly because it's full of inspiration for the holidays from fashion to food, but also because I have contributed three articles to this edition!  One of which is this fabulous bohemian inspired DIY holiday garland.  Check out some photos here and then download the app right here to get the full instructions as well as materials needed for this fun project!


Tuesday, December 3, 2013

{video: easy holiday decor projects}


A few weeks ago, Glam asked me to come out to NYC and shoot some fun holiday DIY projects for their Haute Hostess video series (you can see more of their fun videos right here).  This video shows you how to make a few different easy DIY projects for the holidays- my personal fave is the floral table runner adorned with gold antlers! This was the first time I have ever done something like this on camera (so don't judge too hard!) and while it was a bit awkward at first by the end I was having a total blast.  We also shot another fun video all about holiday cocktails that I can't wait to share with you in a few weeks- see a sneak peek here.


Monday, October 14, 2013

{quick change headboard}


You might remember when we first DIY-ed our headboard back at our old place and then you can see how it fits into the bedroom at our new place in the first photo above.  Turns out our bedroom walls (which we aren't willing to paint) and our headboard are the exact same color which actually wasn't going to be a big issue since I had my eye on one of these beds to replace it.  But then we started taking some real measurements and realized this new bed frame would be just a few inches too big for the room if we wanted to keep our nightstands (which we most definitely do!).  So I decided I would just live with the old headboard until we move to a new place, until I realized on a recent trip to Joann Fabrics that a few yards of fabric could fix this situation in about 30 minutes!

I picked up 3 yards of deep navy duck cloth and this past weekend we simply re-covered the headboard by wrapping directly over the old blue/grey fabric.  While we could have fully removed the old fabric, that would have forced us to also re-do the batting and quite frankly I was just too lazy to do that. I love how it turned out so much that I might actually take some time to research an upholstery shop in Chicago that can make some matching buttons for the headboard out of the leftover fabric that way I can tuft it!


 {those holes on the back of the board are to allow for us to tuft this headboard if we ever get around to it!}


 {the headboard itself is much taller than it appears in these photos, but as you can see the ceiling height in our Chicago place paired with the larger pieces of artwork above our bed force the headboard to remain somewhat lower.}


Have you ever DIY-ed a headboard or even a bedframe before?

Thursday, September 12, 2013

{diy venetian lace robe}


I have been coveting this amazing robe by Stone Cold Fox forever so when I came across an incredible selection of venetian lace on a recent trip to the downtown Los Angeles fashion district, I just knew I had to try my hand at making one for myself.  A yard and half of this ivory venetian lace, this ivory kimono robe and some white thread is all you need to make this for yourself.

The addition of this intricate lace to a simple luxe silk robe gives it fun romantic-bohemian feel- perfect for a lightweight cover up for lounging in on the weekends.  I was pleasantly surprised at how easy this project turned out to be taking only about an hour from start to finish.  These robes would make for a perfect bridal robe on your big day or you could attach the lace to a fun printed robe for your bridesmaids. Directions for this DIY at the bottom of the post.


{I also picked up some black lace to add to a black version of the kimono robe that I already own} 

{pinning is a must when working with slippery silk fabric} 

 {make sure to set your stitches as wide as possible- you will risk snagging the silk with too tight of a stitch}


{breakfast in bed with muji}


what you need:
  • 3/4 sleeve kimono robe (this would be a fun printed alternative)
  • 1.5 yards of Venetian lace- preferably something 4 inches wide or more (I bought mine from this company which is my favorite place for ribbon & trims- you can call them if you are not local to LA and they will ship anywhere! 
  • corresponding thread 
  • sewing needle
  1. Cut the lace to the diameter of the kimono sleeve
  2. Pin lave on top of sleeve- use lots of pins as it will save you later from making a mistake or attaching the lace unevenly
  3. Using your sewing machine sew a wide stitch simple sew right on top of the lace attaching it to the silk sleeve. Trim any loose threads. note: if you do not have a sewing machine you can certainly hand-stitch the entire piece of lace to attach it to the sleeve using a running stitch.
  4. Hand- sew the ends where the lace meets by using a simple Overcast stitch.
  5. Enjoy your fabulous robe. 


Wednesday, August 7, 2013

{diy monogram moleskin agenda}


I recently picked up a brand new Moleskin agenda since I use the ones that are on the academic calender which start in July/August.  Like most Moleskin brand notebooks this one is pretty strictly no frills, but that is exactly what I need on the inside of a planner/agenda.  The problem is that I have never found a great agenda that has the set up like the interior of this Moleskins one, but with a little bit more flair on the outside.  So this time around, I decided I would fancy up my agenda myself.  Using barely half a yard of some amazing ribbon I picked up on my last trip to Britex and a new monogram font I came across, I was able to transform this simple agenda.

I used this extra sticky thin double sided tape from Paper Source to adhere the ribbon around both the front and back covers of the agenda.  Then I used this font to create my monogram (yes my initials are NZX- that's what you get when you are half Lithuanian and then you marry a man with a Greek last name).  I printed it on coated sticker paper that I had leftover from some wedding projects then used this 3 inch circle punch to expertly cut it out.  If you don't want to invest in the monogram font or figure out how exactly to format your printer for special materials, you can buy monogram stickers from this Etsy shop.

This was a quick project that significantly improved the look of my boring agenda- although I think next year I might get serious about finding a fun replacement that has the amount of functionality on the inside that I prefer- any suggestions?