Showing posts with label bedroom. Show all posts

Tuesday, July 22, 2014

{loft bedroom before & after}


In addition to our outdoor deck (which I'll be sharing next week!), we were able to finish the bedroom area of our loft pretty quickly- I mean there is nothing like sleeping on an air mattress for a week and a half to motivate you right?!?  Our old loft actually had walls around the bedroom area, this time around we are in a true loft situation with the bedroom being located just on the other side of the kitchen separated by a partition wall.

Not much has changed in this room since our Chicago bedroom, we had to lose the slatted bench for space reasons and we brought in the Beverly prints from TheAestate since this is the only wall they will fit on nicely.   The moroccan wedding blanket has found a home at the end of our bed and I love the bohemian vibe it adds to the otherwise glam-inspired decor.  The one problem area I haven't figured out in this room is what to put on the gray credenza (which used to be our bar) that is under our largest (and favorite!) piece of art.  I don't want to overload the piece with a bunch of stuff, but it definitely needs something, but I'm not in a big rush to figure it out since it's always nice to have a little project to work on.

Be sure to check back tomorrow for a special giveaway post with The Aestate!!

Sources to items that are still available for purchase (everything else is old or vintage) at the bottom of the post!


diy navy blue headboard
nightstands + overlays (diy here)
bedside lamps
moroccan wedding blanket
white quilted euro & boudoir shams
Beverly Palm prints
picture frames for large prints
floor mirror


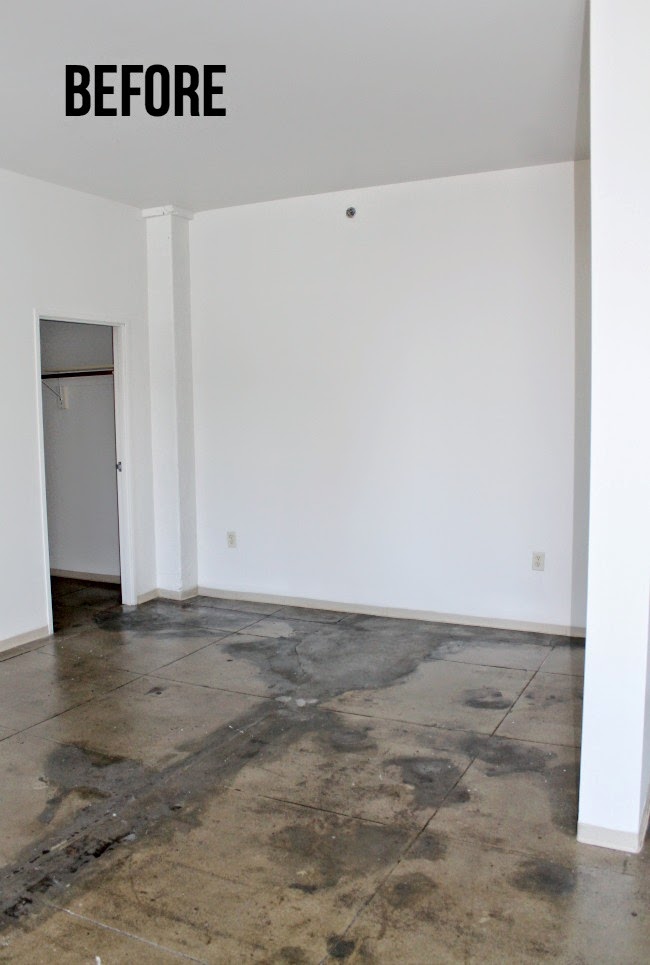
Here's one more sneak peek "before" photo looking into the loft from another angle.  I can't wait to share the living room area which is almost done!!


Monday, October 14, 2013

{quick change headboard}


You might remember when we first DIY-ed our headboard back at our old place and then you can see how it fits into the bedroom at our new place in the first photo above.  Turns out our bedroom walls (which we aren't willing to paint) and our headboard are the exact same color which actually wasn't going to be a big issue since I had my eye on one of these beds to replace it.  But then we started taking some real measurements and realized this new bed frame would be just a few inches too big for the room if we wanted to keep our nightstands (which we most definitely do!).  So I decided I would just live with the old headboard until we move to a new place, until I realized on a recent trip to Joann Fabrics that a few yards of fabric could fix this situation in about 30 minutes!

I picked up 3 yards of deep navy duck cloth and this past weekend we simply re-covered the headboard by wrapping directly over the old blue/grey fabric.  While we could have fully removed the old fabric, that would have forced us to also re-do the batting and quite frankly I was just too lazy to do that. I love how it turned out so much that I might actually take some time to research an upholstery shop in Chicago that can make some matching buttons for the headboard out of the leftover fabric that way I can tuft it!


 {those holes on the back of the board are to allow for us to tuft this headboard if we ever get around to it!}


 {the headboard itself is much taller than it appears in these photos, but as you can see the ceiling height in our Chicago place paired with the larger pieces of artwork above our bed force the headboard to remain somewhat lower.}


Have you ever DIY-ed a headboard or even a bedframe before?

Tuesday, March 26, 2013

{nightstand makeover with ikea overlays}


This project has been on my to do list since before we even moved to Chicago and we finally completed it this weekend!! Our nightstands back in LA were far too small.  The place we lived in before our loft barely even had space for nightstands so we didn't realize how nice it would be to have large nightstands since we were just happy to have them at all when we moved to the loft.  You can see the painting makeover we did on those in one of the first posts on this blog right here.

Although I loved those blue nightstands, they were far too small and could barely fit a lamp and a glass of water at the same time.  In our Chicago place, we went in the opposite direction and purchased these Ikea dressers to be used as nightstands.  They are massive as far as nightstand sizing is concerned and I love it!  You can't beat the price of the pieces in Ikea's Malm series and the clean lines lend themselves to many different types of decor.  While I like the simplicity of these, I did want to put my own stamp on them which is where My Overlays comes in.  There are a handful of sites out there that make overlays specifically sized for Ikea furniture, but I think the ones on My Overlays have the best range of shapes.

The reason this project took us so long to finally complete was not based on the difficulty of assembling them, it was simply because for a while I couldn't pull the trigger on exactly which overlay I wanted to buy.  Then once I made that choice and received the overlays in the mail, they sat in our bedroom forever while I debated which color I wanted to go with.  The overlays arrive in a white color which you can leave as such if that works for you.  I debated between matte black or metallic gold, finally deciding that the black would prove to be a better choice in the long run.

I absolutely love the simple transformation these overlays give to the nightstands, plus the entire process of spray painting them and adhering them to the furniture took a total of an hour and a half (including dry time!)


{lamps from right here}

Thursday, March 21, 2013

{gold bamboo tray}


I recently purchased this vintage gold bamboo tray after randomly stumbling across a link to it on Pinterest.  Maybe you have heard of High Street Market's website, but it's new to me and it took me all of five seconds within being on their site to make a purchase decision (as well as choose a dozen other things to add to my future wishlist!).  While we already have plenty of trays around our place, I have really been on the hunt for something unique to use on my nightstand.  I love the hollywood regency feel from the mix of gold and bamboo plus unique shape of the circular tray made it worth the splurge.  Get one for yourself right here.


Tuesday, August 7, 2012

{our new Chicago place: in progress}


{taken when we first arrived into our new place}


Somehow we actually survived driving a 26 foot moving truck and a car all the way from LA to Chicago and we are now just getting settled into our new place after arriving here last Wednesday.  Moving is always a long process filled with multiple trips to Home Depot or Ikea, searching through countless boxes for the cord to connect your tv and debating paint choices.   We have gotten all of the boxes opened and unpacked and most of our furniture assembled, but we still have a ways to go before I would consider our new home to be complete.  Some of the projects on our to do list right now include painting almost all the rooms (especially the bedroom since our DIY headboard currently matches the blue wall perfectly), setting up our fauxdenza and hanging all our artwork


 {our new tree-lined street and ivy covered building- you cannot even imagine what a pleasant change this is for us coming from the concrete metropolis of downtown LA}


 {supplies for my black & gold bathroom- the mirror is from Ikea and it is currently on my to do list to be painted gold}


 {the Malm dressers set up as night stands awaiting their overlays.  As much as I loved making our previous nightstands, they proved to be way too small to hold more than a small glass of water and a tiny lamp. Robert Abbey Delta Lamp from right here}


 {a new houseplant from one of our Home Depot trips}


{supplies for our "fauxdenza" tv stand.  we are still  trying to find a good resource for the wood top- if anyone knows of a good (not sketchy or creepy) lumber yard in the Chicago area I would love to hear about it!}


I'll be back with updates on these project as we start crossing them off our list!

Tuesday, November 29, 2011

{new wall decor}


A couple weeks ago Chris' sister surprised us with an early wedding gift from our registry.  She gave us the white resin deer and moose from ZGallerie!!  (As a side story- Chris' parents actually thought it was a mistake when his sister told them what she bought for us because they were confused why we had registered for taxidermy.)  We have wanted these for a long time and always thought they would look wonderful on each side of our bed.  Since our walls are bright white, we picked up some pre-cut unfinished wood "shields" from Michaels Crafts and stained them with a dark Varathane wood stain.  

I apologize for the poor quality of these photos; the darkness in our room plus the white animals on white walls make these very difficult to photograph!


Monday, October 24, 2011

{corner closet}


The built in closet that came with our loft is absolutely wonderful except that the closet rod was installed a lot lower than normal and my floor length dresses end up dragging on the ground.  This wasn't really a big deal up until recently when I bought 4 new long dresses for some of the wedding related events coming up.  I have seen people buy small rolling clothes racks to house or display extra clothing, but I didn't want to lose a ton of our floor space in an already small bedroom.  After some brainstorming while wandering around Home Depot, we decided to install a bar on a 45° angle in the corner of our room right outside the closet.  For about $30 in piping and 15 minutes of labor, I now have a bar that is high enough to keep my long dresses from getting damaged.


Wednesday, October 19, 2011

{almost tufted diy upholstered headboard}


Sometimes there are those DIY projects that you start and just never can quite get around to finishing.  We set out to make our own tufted headboard before we moved into the loft.  I picked up this blue grey stretch cotton fabric from the Micheal Levine loft and we were able to whip up the frame and upholster the headboard within an hour or so.  The part that escaped us for next 8 months was the actual tufting of the headboard.  All the tutorials we read said this was the most time consuming part.  We even dropped off fabric to get the buttons for the tufting made at Pepe's in Silverlake and still havent picked them up!  Since we were still planning to tuft the headboard after we moved in, we never got around to mounting the headboard on the wall, but last night with a photoshoot in our loft looming this weekend, we finally got around to putting it up...


 {holes drilled in the back of the board which allow for the tufting!}


You can see the tutorial we followed to make the headboard here.  I promise to actually tuft this thing and share the real finished product in the next month!