Showing posts with label parties. Show all posts

Wednesday, July 3, 2013

{bachelorette party supplies}

Summer means wedding season which is great and all, but the really nice part about wedding season is the cooresponding bachelorette party season!!!  I love a good excuse to throw a fun girly party for a night out filled with champagne and confetti.  My one complaint with bachelorette parties is the obnoxious decor- can we all just agree once and for all to leave the penis crowns and pink zebra striped decorations at the tacky party store where they belong?  Here's a little round up of some fun alternatives for any bachelorette parties in your future:


For the bride:  No need to over-do it, but the bride to be HAS to wear a little something.  This is not negotiable.  When else in her life can she parade drunkenly around in a wedding veil.  Simply inform your bride-to-be friend that this is happening and buy her a simple veil.  And grab the adorable ring sunglasses to go with it!

Groupwear: In addition to the penis crowns, please also leave the matching rhinestone tank tops at home.  You are all better than that and your wardrobes deserve more.  That doesn't mean the ladies shouldn't get the chance to wear a coordinating accessory because like the bride's outfit- when else do you get to parade around with your friends wearing the same cute flair?!?  Colorful flower crowns (diy tutorial here) or bow headbands (see them in action here) make a nice alternative.  Personally I love the chiffon or tulle pouf for the ladies to wear, but I am biased since that's what we did for my bachelorette- see an easy tutorial for those here.   You can't go wrong with a simple pair of earrings like these or festive Lolita sunglasses.

Decor:  If you can just recreate the decor from this amazing 30th birthday party then you will be all set!!! Throw in a pink + gold tassel garland from The Flair Exchange to fancy up your hotel room and add a cute fringed heart on the wall- perfect for photo ops!

Activities:  Since most guests will expect a game, why not make it enjoyable for everyone and have a little blindfolded champagne tasting contest.  Buy a few different bottles of champagne- have all the girls blindly taste them and see if they can guess which is which! Don't forget to pick up a cute blindfold!

Favors:  Whether it is the bride to be or the main party planner who buys some favors for the guests, it is always fun to have a little something to thank everyone for coming.   Load up a cute tote bag with custom cocktail bottles, nail polish and other fun items- see some more ideas what to put in these bags here

Special Extras:  These are just some fun items to bring along for extra credit- girl's night table topics would make for a fun late night activity, custom name krazy straws would be perfect for guests to keep track of their drink and of course a secret stash of confetti never hurts!


Thursday, January 10, 2013

{oscars viewing party inspiration}

I absolutely love awards season!!! (I am practically counting the minutes til the Golden Globes this Sunday!)

This morning the nominations for this year's Academy Awards were released so I thought I would share a little Oscars party inspiration I put together for the viewing party we are planning on holding next month!  Getting together with friends to watch the ceremony (and red carpet!) is a great excuse wear some sequins, drink champagne and have a little friendly competition with personal Oscar ballots! Hopefully I'll do better than last year- see that epic fail right here.


Tuesday, January 8, 2013

{recent custom work}

I have had quite a few custom orders through my Etsy shop recently and I thought I would share photos from events for two of those clients here!


BHLDN Chicago asked me to create a custom "Bubbly" glitter sign along with one of my "Cheers" and "Sweets" signs for their Bourbon, Bowties, Baubles & Bubbles holiday event this past December.  The event was part of a trunk show for jewelry design, Melissa Joy Manning, and included an array of baubles for customers to try on as well as a selection of bowties and bourbon for the guys!  All images courtesy of the lovely Stoffer Pohotographers:


 {large custom "Sweets" sign alongside an array of delicious treats from Sugar Chic}


 {BHLDN's array of short wedding styles}


 {custom "Bubbly" sign adorning the cutest bar cart ever}


 {cheese "cakes" created by Sugar Chic- these were a real hit at the party and what a great alternative to a traditional dessert table!}


 {the bow tie set up with florals by Pistil & Vine}


 {my custom "Cheers" sign hanging above the bourbon tasting area provided by FEW Spirits}


I was also recently contacted by Oh It's Perfect in Australia to create some printables for an upcoming engagement party they were planning.  We first modified the "Sequins & Bowties" invite to be sent to all the guests and then I created some smaller paper good items for the dessert spread.  I absolutely love their color scheme of yellow, black, white and gold!  All images via Oh It's Perfect:

 {what a perfect credenza to use for this party scheme!}


{You might recognize those cake stands from Lauren of A Fabulous Fete's Etsy shop} 


{the custom chocolate wrappers I created to celebrate Maddy & Sum's engagement}


Thursday, January 3, 2013

{a new years eve dinner party}


New Years Eve is one of my favorite holidays- probably because it's a holiday that requires getting dressed up and I'll practically take any excuse I can get to throw on some sequins.  If you saw my inspiration board earlier this week, then you know that we decided to throw a little dinner party on new years eve for 11 of our closest friends.  Everyone came dressed in their best, we served light appetizers, sat down for dinner around 9:30 and then rang in the new year followed by a very southern California late night pool sesh!

Originally I had wanted to try to re-create this party for the decor of our NYE dinner, but many of the elements I would have needed to execute this theme well were back in our Chicago place.  After spotting this Monte Carlo NYE boxed set at Moskatel's, I decided the loud color scheme would be perfect for an extra vibrant table setting.  I picked up a few yards of silver sequin fabric to use as a tablecloth and gold chargers to make each place setting really pop.  Details on some of the other smaller table elements are under some of the photos below.

We discussed different menu options for a while, but ended up going with a classic steak frites with filet mignon topped with herbed compound butter served alongside white truffle fries with garlic aoili and sauteed cauliflower with romesco.  We started the meal with our our go to Kale Caesar salad and ended with a trio of mini ice cream sandwiches. There is no better New Year's Eve (or any night for that matter) than one surrounded by great food, champagne and close friends.  Hopefully there is some truth to theory that how you spend your New Year's Eve indicates how the rest of your year will be because if it is then 2013 is looking like it's going to be pretty great... 


 {I threw together this backdrop using 2 packs each of gold metallic and white tissue fringe as well as 1 pack each of silver metallic and purple metallic fringe.  I simply cut pieces of the garland and arranged it in messy strips that I stapled onto on old sheet.  I also couldn't pass up picking up two of these awesome champagne bottle balloons}


 {NYE crowns from the boxed set, gold chargers from Sur La Table & custom menus I created}


{I re-purposed a box of silver Christmas crackers by using them as placecards with each guest's name printed on regular copy paper then adhered around the cracker with some spray adhesive}


 {Raspberries for cocktails and champagne displayed in a vintage martini glass}


 {two batches of make-ahead Manhattans in vintage decanters}


 {one of my new favorite frozen appetizers from Trader Joe's}


 {frozen mini Eggos paired with box of KFC's popcorn chicken and a light drizzle of maple syrup created a mini take on "Chicken & Waffles"}


 {a little herbed compound butter never hurts anything}


 {guest's resolutions that we burned in the fire right before midnight}


 {for dessert we served a trio of mini ice cream sandwiches. from left: Pepperidge Farm Soft Baked Sugar cookies with strawberry ice cream, Oreo Cakester cookies with dirty mint chip ice cream, and Trader Joe's soft baked Chocolate Chip cookies with Ducle de Leche ice cream.  This dessert is so easy to make and is always a crowd pleaser.  You can prepare the sandwiches hours ahead of time, pop them back into the freezer and then remove them 5 minutes before you want to serve.  Always make sure to get soft baked cookies- plus a little sparkler never hurts}

{my girlfriends and I with our favorite prop of the night- a gigantic glass champagne flute that we filled with an entire bottle of champagne!}


Monday, December 31, 2012

{new years eve dinner party inspiration}

This New Year's Eve, Chris' parents offered up their house in Huntington Beach for us to host a dinner party at while they are out celebrating the New Year in Palm Springs. Rather than have a stressful night out on the town, we quickly jumped at the chance to have a dressed up evening in alongside our closest friends.  Here's a little inspiration board I put together for the night and Ill be sure to share photos later this week.

Happy New Year!

Friday, December 28, 2012

{the parties of 2012}

Wow! 2012 was a whirlwind year that seemed to fly by!  Even though it felt like everything was moving at double speed, we got the chance to throw some amazing celebrations this year including one really big one- our wedding!  Here's a little recap of all my favorite parties from 2012 and based on these fabulous events, I cannot even wait to see what 2013 holds for us:

 {the "breakfast for dinner" themed party we threw for our good friend Kay- complete with a pancake stack cake! Definitely one of my favorite party themes since it was super easy to execute and who doesnt love breakfast food in the evening?!?!}


 {a garlic centric dinner party we threw in our new Chicago dining room.  This was first dinner party we had in our new place and I loved creating a menu around one ingredient}


 {a relaxed dinner party menu- one of the only posts where I featured a complete menu 
along with wine pairings!}


 {a colorful and fun engagement party some of my friends and I threw for our newly engaged pals,
Jeff & Katie.  My favorite part of this party was the DIY slider bar!}


 {my bridal shower- I definitely had absolutely nothing to do with the planning and execution of this party. All of the credit for this beautiful event goes to my bridesmaids, mom and mother -in-law.  I just loved this party so much, I had to include it!}


 {our "sequins & bow ties" themed going away party! This theme is hands down the best one I have ever thought of- I wouldnt mind if this was the theme for every single party going forward.}


 {breaking tradition for our birthdays this year, we opted to throw a cocktail party rather than the 20 person sit down dinner we usually choose to host- this was also the very first big party we threw in our new Chicago place, but surely not the last}


{a "champagne & desserts" themed partI threw for my good friend's 26th birthday party- another theme that I wouldn't mind using for many future parties!}


And of course- the best party of this year for us was our wedding in Palm Springs last April:

Tuesday, December 4, 2012

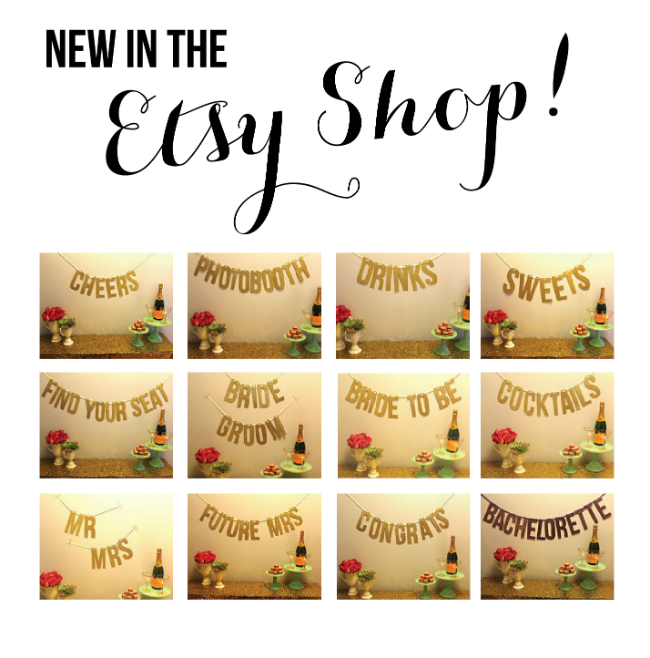
{glitter banners in the etsy shop}


After getting multiple requests to sell the gold glitter Happy Birthday Banner from this post, I decided to add a few for sale in my Etsy shop.  


Here are a few of my personal favorites!


Tuesday, November 6, 2012

{glitter letter banner}


So here's the thing...some people are really good are free hand drawing letters and I just so happen to not be one of those people.  So here's a little tutorial on how you can make a glittered letter banner for yourself without agonizing over horribly hand-drawn letters.  I will warn you that this is certainly not a quick project, but it is rather simple and quite honestly I haven't found a better way to achieve letters like this (if you have please let me know)!!

I have spotted quite of few of these glittered letter banners around (like this or this or these), but haven't really got around to trying my hand at one until now.  I figured if I was going to spend the time making one that I should make a phrase which I could get some use out of in the future so I decided to make a gold glitter "happy birthday" banner for the upcoming Champagne & Desserts party.  Since I know some other people who have birthdays, I can't imagine this will be the last time this banner gets used.

The method is similar to what we used for our wedding signs (see that tutorial here) except this time the letters you are printing are to be used as stencils.


what you need:

  1. Using a simple Microsoft Word document, print out all the letters you will need for your phrase. For my letters which are about 5 inches tall, I used the "bebas neue" font at size 600. In order to save ink, I also changed the letters to an outline rather than a full fill. 
  2. cut out each letter using an exacto knife to get the interior areas.
  3. trace letters onto the back of your gold glitter cardstock making sure to reverse letters that require it.  (one of the best parts about the Bebas font is that many letters that normally would need to be reversed will not require it! yay saving time!)
  4. cut out each glitter letter and use exacto knife for interior areas
  5. using a hole punch, punch out two holes about an inch apart at the top of each letter. For some letters you can punch one hole in each part of the letter like the Y or H.
  6. string your ribbon through each set of hole punches.
  7. enjoy!